

Are you sure? You can't see it!
Hanging a Heavy Mirror or Shelf or even a Large Picture that requires going into wood and not just the Dry Wall, can be frustrating when trying to find solid wood behind the Drywall for a Nail or Screw.
That wood you're looking for is referred to as the Wall Studs. The Studs support the Roof and all that is attached plus holding up the Drywall.
The Studs are spaced a certain distance from each other. The measurement is from the center of one Stud to the center of the next.
The width of a Typical Wall Stud is 1 1/2". A small Tidbit that could be of some help. Most Wall Studs have an Alignment that matches the Drywall Sizes, Horizontally they are 4 foot tall and 8, 10, 12, & 16 foot Wide. So 3 Vertical Studs 16" center to center equals 4 feet or 2 studs @ 24" center to center equal 4 feet.
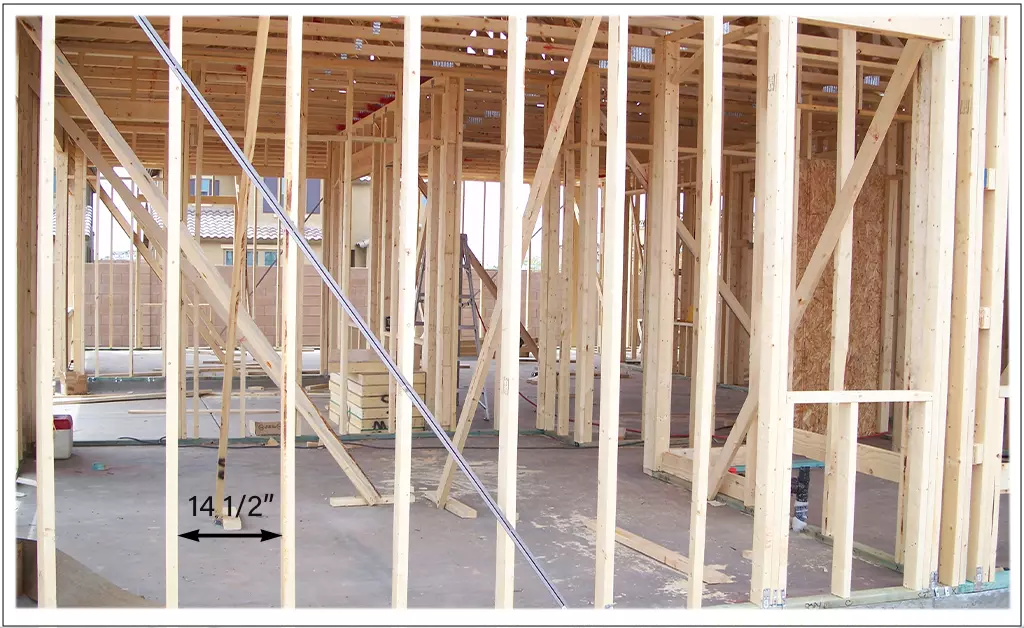
The Image below is an Outside wall of a Framed House with Studs Placed 16" Center to Center or The Distance in between the Studs is 14 1/2". This Image does not Show any Electrical Wiring.
Block or Brick Construction is going to be similar on the Inside. There should be Furring Strips that are wood Strips usually 1 1/2" thick and could go up to 6" deep depending the Insulation requirement.
These Strips create a firm and level foundation for Drywall and provide an area for Electrical Wiring or other Services needed from one location to another. Locating the Suds is the same as a Wood Framed Home.

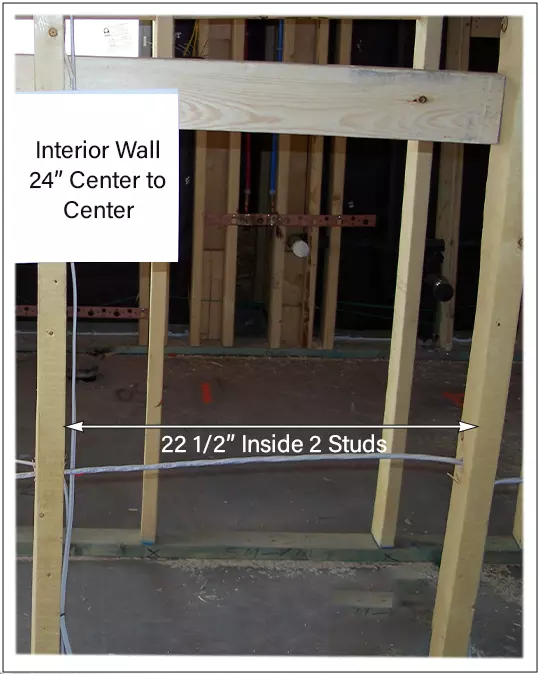
The Image below shows an Interior Wall with the Studs at 24" Center to Center or 22 1/2" between the 2 Studs. This Image does have the Electrical Wiring in place. Normally but not always the Wires run Horizontally, close to the Alignment of the Outlets.

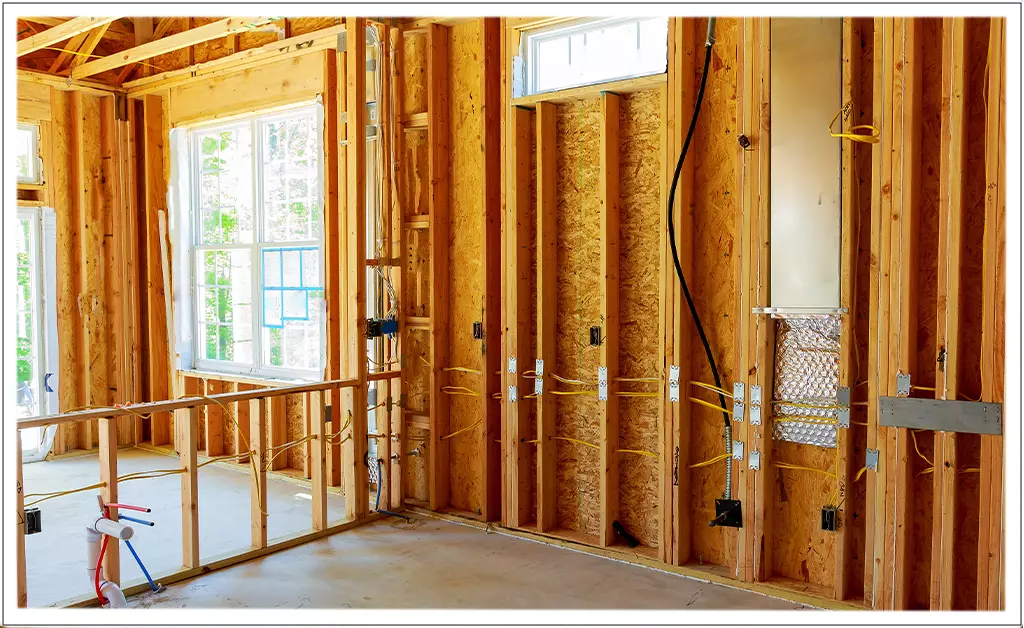
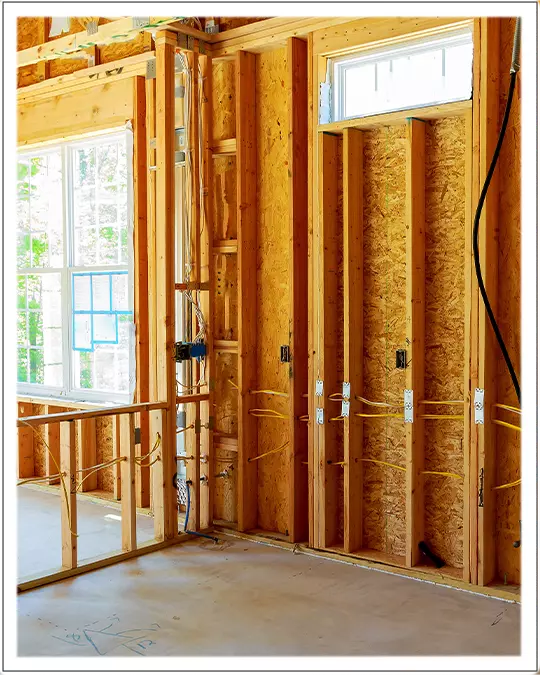
In the Image below (to the right) the wires have Metal Plates attached to the Studs where the Wires go through. These are Nail Protector Plates that are installed on Studs or any location you want protected against Puncture from Nail or Dry Wall Screws.
I mention this because you could be trying to put in a Nail or Screw to hold a Bracket or Picture and it just won't go. This can be very Frustrating if you have no idea what is preventing the Nail or Screw from going in.
In this same Image to the left you will notice there are "NO" Nail Protector Plates. This is probably the Normal for most Wall Studs with Wires passing through. Don't depend on the Nail Protector Plates, use Short Screws or Nails (1") if you think you may be close to an Outlet or Wires passing through.
This happened to my Neighbor, their 3rd Son was home from College and eager to help hang a Large Picture, He is very capable at any Task. He borrowed my Stud Locator to be sure where to put the Screw, only to make the lights go Out when He Drilled. He did puncture the Wire passing through the Studs. Be aware it can happen.
Tips
If you do not have a Stud Finder then you can start by Knocking or Taping on the wall you can hear a different sound when you come upon a Stud, it is Solid sounding and Hollow sounding on either side. Keep in mind the width of a Stud is 1 1/2", Finding a Stud by tapping the wall is not exact but a General Location.
To get an Exact Location you could Hammer in a very small nail to Verify and get the exact location, you only have to go in about 1/2" you can zero in by going to one side until you go through without hitting wood then measure over 1 1/2". This Method leaves a small hole so you want to be in an area that is not normally visible, unless you are going to paint soon.
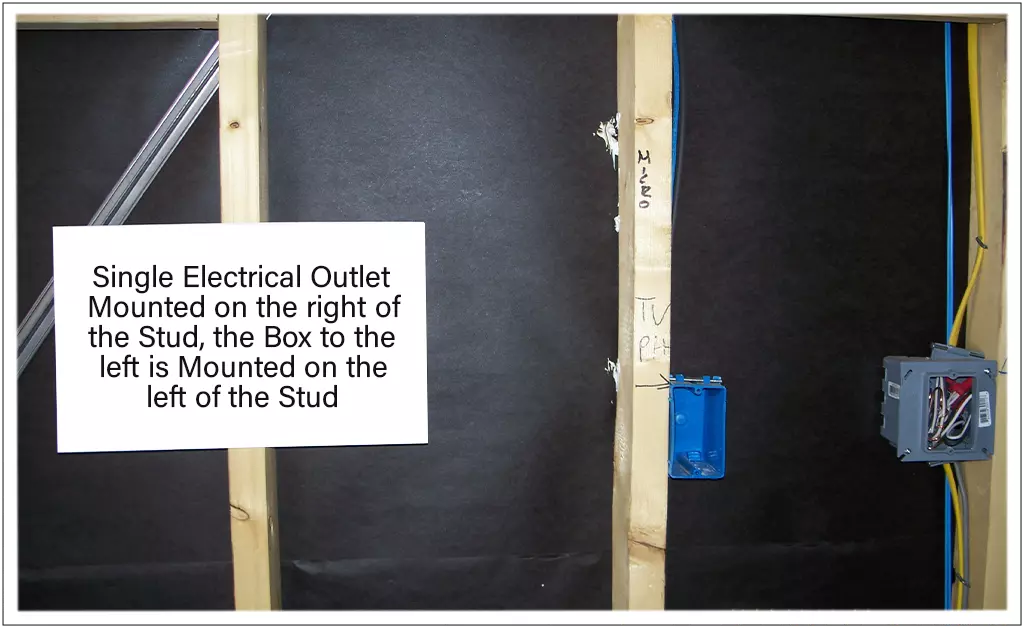
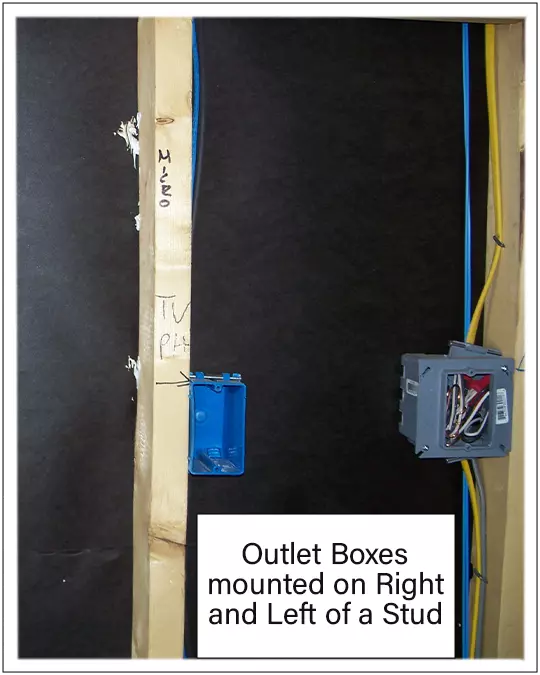
Use the Electrical Outlet (plug in) to help locate a Stud. In the image below there is a Outlet mounted to the right side and left side of a Wall Stud. Remove the Plastic Cover to see the actual size. If you have tapped on the wall you will know on which side of the Box the Stud is. Measuring 1 1/2" should give you a pretty good Idea of the Stud Location.
Like this Article, you can give us a Thumbs just click on the Icon. It's anonymous and we will Thank You.

“The most effective way to do it, is to do it”
Amelia Earhart
© Copyright 2023 YPRemodel.com. All rights Reserved. This material may not be Published, Broadcast, Rewritten or Redistributed without written Permission.